
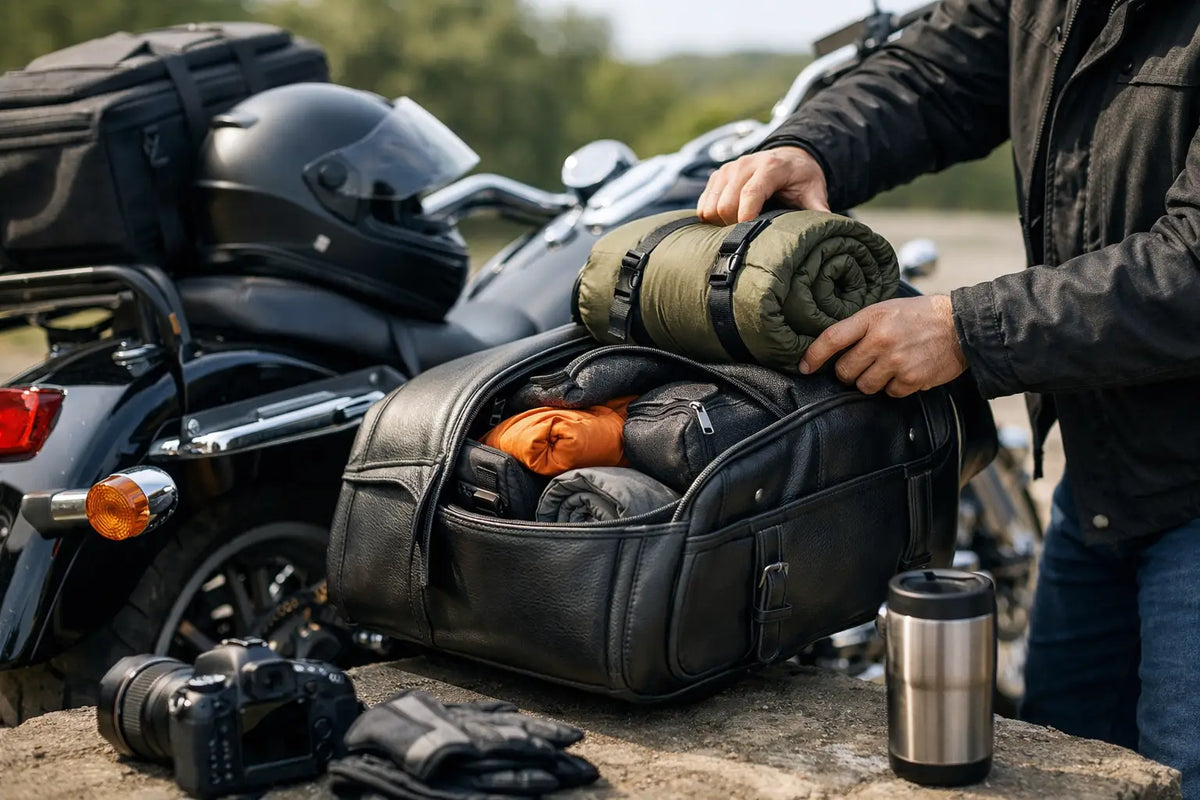
A bike that feels twitchy in a corner or sloppy at a stoplight usually isn't the bike's fault. It's the load. If you're figuring out how to pack motorcycle saddlebags, the goal isn't cramming in more gear. It's keeping weight balanced, protecting what matters, and making sure you can grab what you need without unloading half your ride on the shoulder.
Packing saddlebags well changes how the motorcycle handles, especially on cruisers and touring bikes carrying extra gear over distance. Good packing keeps the center of gravity predictable, reduces shifting, and saves you from digging around for rain gear while the sky opens up. There is no one-size-fits-all setup, but there are rules that work almost every time.
How to pack motorcycle saddlebags without wrecking balance
The first rule is simple - pack by weight before you pack by category. Riders often load one side with tools, locks, and heavy gear, then toss clothes on the other side and call it done. That creates uneven handling, and you will feel it at low speed, during lane changes, and when you put a foot down.
Start with the heaviest items low and as close to the bike's centerline as possible. If you're carrying tools, tire repair gear, a compact air pump, or chain lube, those should sit near the bottom of the bags, not stacked high or shoved into an outer pocket. If one side must carry a heavier item, offset it with something substantial on the other side rather than leaving the load uneven.
Weight also needs to stay stable. Loose gear shifts. Shifting weight changes the bike mid-ride, and that gets old fast. Use packing cubes, zip pouches, or roll bags inside the saddlebags so items stay locked in place. Hard bags help with structure, but even they can turn into a junk drawer if everything is free-floating.
Check your bike's luggage weight limits before a long trip. A lot of riders think only about available space. Space is not the same thing as safe load capacity. Add the weight of the bags, the gear, and any luggage mounted elsewhere, then factor in passenger weight if you're riding two-up. Overloading doesn't just hurt handling. It also beats up mounts, suspension, and tires.
Pack for access, not just storage
A smart saddlebag setup is about what you can reach fast. If you have to unpack socks, a hoodie, and a tool roll to get to your rain gloves, you've packed for a photo, not for the road.
Think in layers of access. The stuff you might need during the ride goes on top or in the easiest-to-open section. That usually means rain gear, an extra face covering, gloves, sunglasses, a small first aid kit, and whatever you need at fuel stops. The gear you only need at the hotel, campsite, or garage can sit deeper in the bag.
Keep your everyday grab items in the same place every ride. Left bag for tools and roadside essentials, right bag for personal gear and weather layers is a common setup because it creates muscle memory. When you're tired, cold, or standing in a gas station lot after dark, routine matters.
If you're carrying documents, registration, or anything you absolutely can't afford to lose, don't bury them under heavy gear where they can get crushed or soaked. A separate weather-resistant pouch is the better move.
What should go in each saddlebag
There is some rider preference here, but a balanced split usually works better than assigning one whole bag to clothing and the other to equipment. Try dividing your gear by function and weight.
One side can carry dense essentials like tools, tire plugs, a mini compressor, bungee cords or straps, and a compact lock. The other side can hold clothing, base layers, socks, gloves, and personal items. If your tool kit is especially heavy, move a pair of boots, a heavier jacket liner, or other dense items to the opposite side to keep things even.
For overnight or weekend rides, rolled clothes usually pack cleaner than folded clothes and waste less space. Shoes are bulky, so unless you really need a second pair, skip them or strap them elsewhere. Toiletries should be in a sealed bag because one busted cap on shampoo or toothpaste can turn the inside of your luggage into a mess.
Electronics need extra thought. Saddlebags can take vibration, heat, and moisture. Phones, battery packs, cameras, and chargers should be padded and protected, not tossed in next to a steel tool roll.
Weather protection matters more than most riders think
A lot of riders learn this one the hard way. "Water-resistant" is not the same as waterproof, and even hard bags can leak when seals get tired or a storm runs all day.
If you're serious about protecting your gear, pack with a second layer of defense. Dry bags, zip pouches, and trash compactor bags all work. The cleanest setup is to keep clothing in one waterproof inner bag and electronics or documents in another. That way, even if the saddlebag takes on water, your ride doesn't end with soaked jeans and a dead charger.
It also helps to pack by consequence. Ask one question: what can get wet, and what absolutely can't? A spare T-shirt getting damp is annoying. Wet medication, paper documents, or electronics is a bigger problem. Protect based on risk, not just convenience.
Cold-weather riders should also think about condensation and temperature swings. If you're rolling through mountain air in the morning and heat later in the day, sealed bags can trap moisture. Let gear breathe when you stop for the night instead of leaving everything compressed.
Don't waste space on bad packing habits
The biggest mistake in learning how to pack motorcycle saddlebags is treating them like car trunks. Saddlebags reward discipline. They punish "just in case" packing.
Most riders bring too many clothes, too many duplicate personal items, and bulky pieces they never touch. Pack for the ride you are actually taking, not the fantasy version with five weather systems and three outfit changes per day. If you're gone for a few days, plan to re-wear jeans, rotate shirts, and keep your load tight.
Another bad habit is stuffing every gap with random extras. That feels efficient until you need one item and have to dump the whole bag in a parking lot. Empty space is not always wasted space. A little room makes repacking easier and gives you flexibility for layers, snacks, or whatever you pick up on the road.
Compression helps, but don't overdo it. Cranking everything down into brick-hard bundles can make bags awkward to close and harder to organize. The best pack is compact, not jammed.
Day ride setup vs. trip setup
A day ride loadout should stay lean. You usually need tools, water, weather backup, a first aid kit, and maybe a light layer. That's it. A saddlebag packed for a weekend trip can feel like overkill on a short run, and extra weight with no purpose is still extra weight.
For weekend or multi-day rides, your setup changes because self-sufficiency matters more. Now you're carrying spare clothing, charging gear, hygiene basics, and maybe a few campsite items. The trick is keeping your core riding essentials in the same place no matter the trip length. You don't want to relearn your bag layout every time.
Long-haul riders sometimes use one saddlebag as a "road bag" and the other as a "camp bag" or "hotel bag." That works well if you're disciplined. The road bag handles anything needed before you shut the bike down for the night. The other bag stays mostly closed until you're done riding.
Final checks before you roll
Once the bags are packed, don't just trust the look of it. Press on both sides and feel the weight. Sit on the bike, lift it off the stand, and see if the load feels even. Check that nothing interferes with shocks, exhaust, wheel travel, or passenger space. If you use throw-over bags, confirm they are cinched down tight and cannot drift inward.
Take a short test ride before a big trip if you've changed your load or luggage setup. A ten-minute loop tells you a lot. If the bike feels off, repack before you hit the highway.
Packing right is part of riding right. Keep the load balanced, keep the must-have gear easy to reach, and don't haul junk you won't use. When your saddlebags are set up the right way, the bike feels cleaner, the stops go faster, and the miles get a whole lot easier.

No comments yet. Be the first rider to weigh in.