
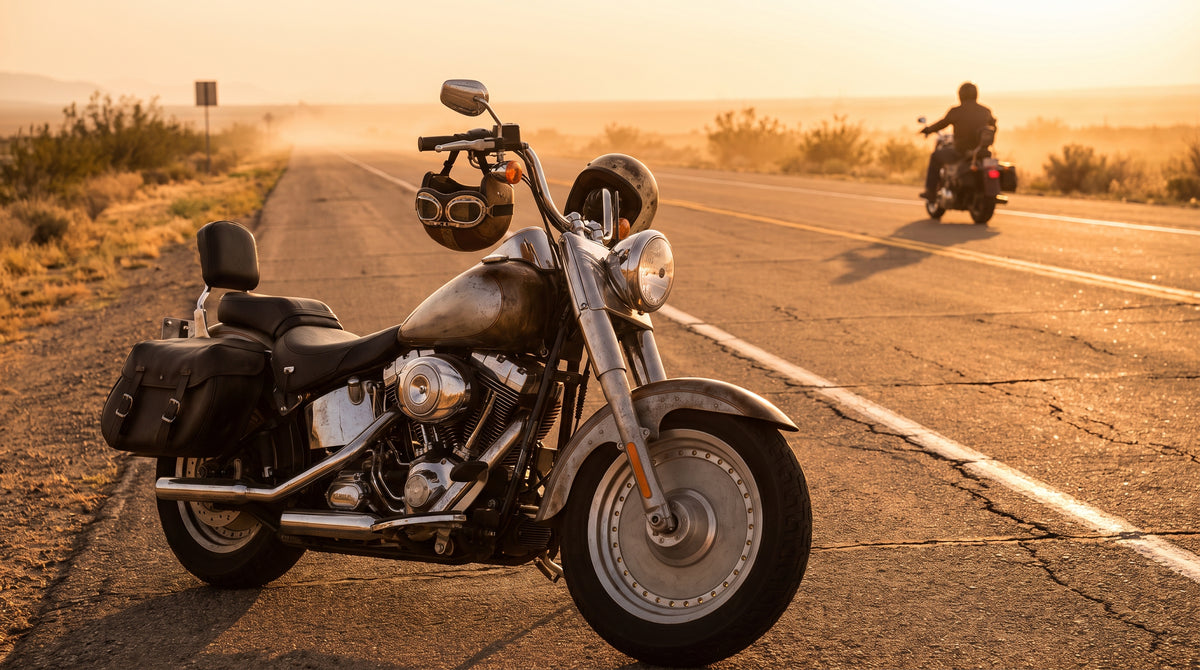
Clip-on sunglasses work fine until you hit 45 mph with no face shield. Your eyes tear up, road grit stings, and by the time you blink clear you've drifted two feet toward the shoulder. That's the moment most cruiser riders start shopping for proper biker goggles. The right pair seals around your eye sockets, blocks wind from every angle, and stays put when you tuck into a headwind on the interstate.
This guide covers every type of biker goggles worth buying, from sealed foam-padded riding goggles to split-lens options that work over prescription glasses. You'll learn which lens tints match which riding conditions, what to look for in the frame and seal, and how to avoid the problems that ruin most cheap goggles within a month.
What Makes Biker Goggles Different from Regular Sunglasses
Sunglasses sit on your nose and leave gaps at the top, bottom, and sides. At 30 mph those gaps funnel wind directly into your eyes. At 60 mph the air pressure pushes tears sideways across your temples. Biker goggles solve this with three features that sunglasses simply don't have.
Foam seal: A strip of closed-cell or open-cell foam lines the inside perimeter of the goggle frame. It presses flush against your brow, cheekbones, and temples. Closed-cell foam (think wetsuit material) blocks wind and dust almost completely. Open-cell foam breathes better but lets more particles through. The Bobster Cruiser II, one of the most popular sealed riding goggles on the market, uses a dual-density foam that combines both types. It retails around $25 and fits over most prescription eyeglasses.
Elastic strap: Instead of temple arms that slide off under a helmet, biker goggles use an adjustable elastic strap that wraps around the back of your head or sits outside your helmet. This keeps the goggles locked in place at any speed. Most straps run 15 to 18 inches and include a silicone-grip strip on the inside to prevent slipping on smooth helmet shells.
Wrap-around coverage: The lens or frame curves around your peripheral vision. A good pair of biker goggles covers roughly 180 degrees, compared to about 140 degrees on a typical pair of wrap sunglasses. That wider coverage matters when you're scanning for lane-changing traffic at highway speeds.
Three Types of Biker Goggles and Who They Fit Best
Classic Aviator and Leather-Trim Goggles
These are the goggles you picture when someone says "biker goggles." Chrome or brass rims, leather or faux-leather padding, clear or tinted lenses, and an elastic strap. They pair naturally with open face helmets and half shells. The Halcyon Mark 49 is the benchmark in this category. It uses real leather trim, a shatterproof polycarbonate lens, and a split-lens design that opens for ventilation. Pricing runs $45 to $90 depending on lens tint. Budget alternatives from brands like SOXICK and Bertoni start around $15 to $25 with ABS frames and synthetic leather.
Foam-Sealed Sport Goggles
These look closer to ski goggles or MX goggles. A single polycarbonate shield, thick foam seal, and wide elastic strap. They block wind, dust, and bugs more completely than aviator-style goggles because the shield covers your entire eye area in one unbroken piece. The Oakley O-Frame MX ($35) is the gold standard in this category. It uses Lexan lens material with 100% UV filtering and a 3-layer face foam. Sport goggles work best for riders who prioritize function over the classic biker look.
Over-the-Glasses (OTG) Goggles
If you wear prescription glasses, OTG biker goggles are the most practical option. They have a wider internal frame cavity that fits standard eyeglass frames without pressing them into your nose or temples. The Global Vision Eliminator ($20) is one of the most common OTG options. It fits frames up to 5.5 inches wide, uses a foam-sealed perimeter, and comes with an interchangeable lens kit (clear, smoke, yellow). The only trade-off is bulk. OTG goggles sit further from your face, which adds about 0.5 inches of profile compared to standard goggles.
Lens Tints for Biker Goggles: What Each Color Actually Does
Most riders default to smoke lenses, but the wrong tint for the conditions is worse than no goggles at all. Here's what each common lens tint is designed for and when to use it.
| Lens Tint | Light Transmission | Best Conditions | Worst Conditions |
|---|---|---|---|
| Clear | 85-90% | Night, overcast, dawn/dusk | Bright sun (no glare protection) |
| Smoke/Gray | 15-25% | Bright sun, highway glare | Night, tunnels, heavy shade |
| Amber/Yellow | 65-80% | Overcast, fog, flat light | Direct bright sun |
| Mirror (chrome/blue) | 10-20% | Extreme sun, snow glare | Anything below full sun |
| Photochromic | 25-85% (auto) | Variable (adjusts to light) | Rapid transitions (slow to adapt) |
Amber lenses are the most versatile single-tint choice for riders who don't want to carry multiple lenses. They boost contrast in flat light, cut glare on overcast days, and still work reasonably well in moderate sun. The yellow-orange tint increases contrast by filtering blue light, which sharpens the edges of potholes, road debris, and lane markings. This is why shooting glasses and aviation lenses often use the same amber tint.
Photochromic lenses adjust their tint based on UV exposure. They darken in bright sun and lighten in shade. The downside is speed. Most photochromic lenses take 30 to 60 seconds to transition fully. If you ride through a tunnel at 60 mph, the lenses won't clear fast enough and you'll be riding semi-blind for 15 to 20 seconds. For pure daytime riding, a fixed smoke or amber tint is more predictable.
Biker Goggles vs. Riding Sunglasses vs. Flip-Down Visors
Each option has a use case. Here's how they compare side by side.
| Feature | Biker Goggles | Riding Sunglasses | Flip-Down Visor |
|---|---|---|---|
| Wind seal | Full (foam sealed) | Partial (side gaps) | Full (face shield) |
| Dust/debris protection | High | Moderate | High |
| Works with open face helmet | Yes | Yes | Only if helmet has snaps |
| Works with half helmet | Yes | Yes | No |
| OTG (over glasses) | Many models | Rare | Most allow glasses |
| Fogging risk | Moderate (needs venting) | Low | High (enclosed space) |
| Price range | $15-$90 | $20-$80 | $25-$40 (snap-on shield) |
| Classic biker look | Strong | Moderate | Weak |
For riders wearing open face or half shell helmets, biker goggles offer the best balance of wind protection and style. Riding sunglasses work at lower speeds (under 40 mph) but leave too much exposed skin and eye area at highway pace. Flip-down visors are the most protective option but only work on helmets with the right snap mounts, and they fog badly in humid conditions unless you add an anti-fog insert.
Anti-Fog: The Feature That Separates Good Biker Goggles from Bad Ones
Fogging is the number one complaint about sealed goggles. You seal the frame tight against your face to block wind, which also traps warm moisture from your skin and breath. Within minutes the lens fogs from the inside. A fogged lens at 55 mph is genuinely dangerous.
Good biker goggles handle fogging in three ways. Venting: small channels cut into the top or bottom of the frame that let air circulate without creating a direct wind path to your eyes. The Bobster Cruiser II uses top-mounted vents that work well up to about 50 mph. Anti-fog coating: a hydrophilic layer applied to the inside of the lens that spreads moisture into a thin, transparent film instead of letting it bead into fog. Most coatings last 6 to 12 months before needing reapplication. Dual-pane lens: two lens layers separated by a small air gap, like a double-pane window. The air gap insulates the inner lens from the temperature difference outside, which is what causes condensation. The Smith OTW (Over the Wire) Turbo Fan goggle ($70) takes this a step further with a battery-powered micro-fan that circulates air between the panes.
If your goggles don't have built-in anti-fog, aftermarket anti-fog sprays like Cat Crap ($8 for a 0.5 oz tube) or Rain-X Anti-Fog ($5) work as a temporary fix. Apply a thin coat to the inside of the lens, let it dry, and buff with a microfiber cloth. Reapply every few rides.
Five Mistakes Riders Make When Buying Biker Goggles
Choosing style over seal. A chrome-rimmed aviator goggle looks incredible hanging on a helmet hook. But if the foam doesn't seal flush against your face shape, wind enters from the top or sides and the goggles become useless above 35 mph. Always press the goggles against your face before buying. There should be zero gaps between the foam and your skin, especially around the nose bridge and outer temples.
Ignoring UV protection. Not all tinted lenses filter UV. A dark smoke lens without UV coating is actually worse for your eyes than wearing nothing, because the dark tint dilates your pupils while UV radiation passes straight through. Look for lenses labeled UV400 or "100% UVA/UVB protection." Any lens under $10 that doesn't specify its UV rating is suspect.
Buying one tint for all conditions. A single pair of smoke-tinted biker goggles works in bright daylight. It does not work at dusk, at night, in tunnels, or in heavy overcast. Carry a second pair with clear or amber lenses, or buy a goggle kit that includes interchangeable lenses. The Global Vision Eliminator kit ($20) and the Bobster Cruiser II ($25) both include three lens options in the box.
Skipping the strap test with your helmet. Goggles that fit perfectly on bare skin might not work with your helmet. The strap needs to sit either under or over the helmet shell without bunching or sliding. Some helmet shapes push goggles forward when you pull the strap tight, which breaks the face seal. Try goggles on with your actual helmet before committing to a pair.
Forgetting ventilation in humid climates. Sealed goggles with no venting will fog in Florida, Georgia, or any coastal ride within minutes. If you ride in humidity above 60%, prioritize goggles with top or bottom vents. You sacrifice a small amount of dust protection for a lens you can actually see through.
How to Pick the Right Biker Goggles for Your Ride
Match the goggle to your helmet and riding conditions. If you wear an open face helmet on a cruiser and want the classic look, leather-trim aviator goggles in the $30 to $60 range are the sweet spot. If you wear a half shell and ride year-round, foam-sealed sport goggles with interchangeable lenses give you the most flexibility. If you wear prescription glasses, an OTG model is really the only option that doesn't force you to choose between seeing the road and protecting your eyes.
For lens choice, buy amber if you're picking just one tint. It handles the widest range of lighting conditions. If you can carry two pairs, go with smoke for daytime and clear for night and low-light riding. Avoid photochromic lenses unless you never ride through tunnels or shaded overpasses.
Check the frame material. Polycarbonate frames weigh less and cost less. TR-90 nylon frames flex without breaking on impact. Metal frames (chrome, brass) look the best but weigh more and can dig into your face on long rides. For the lens itself, polycarbonate is the standard. It's shatterproof, lightweight, and passes ANSI Z87.1 impact testing in most riding goggles above the $15 price point.
If you're shopping for a pair, the riding goggles collection has sealed and OTG styles for every type of ride. For a deeper look at the aviator and vintage end of the spectrum, the vintage motorcycle goggles guide breaks down that category in detail.
No comments yet. Be the first rider to weigh in.