
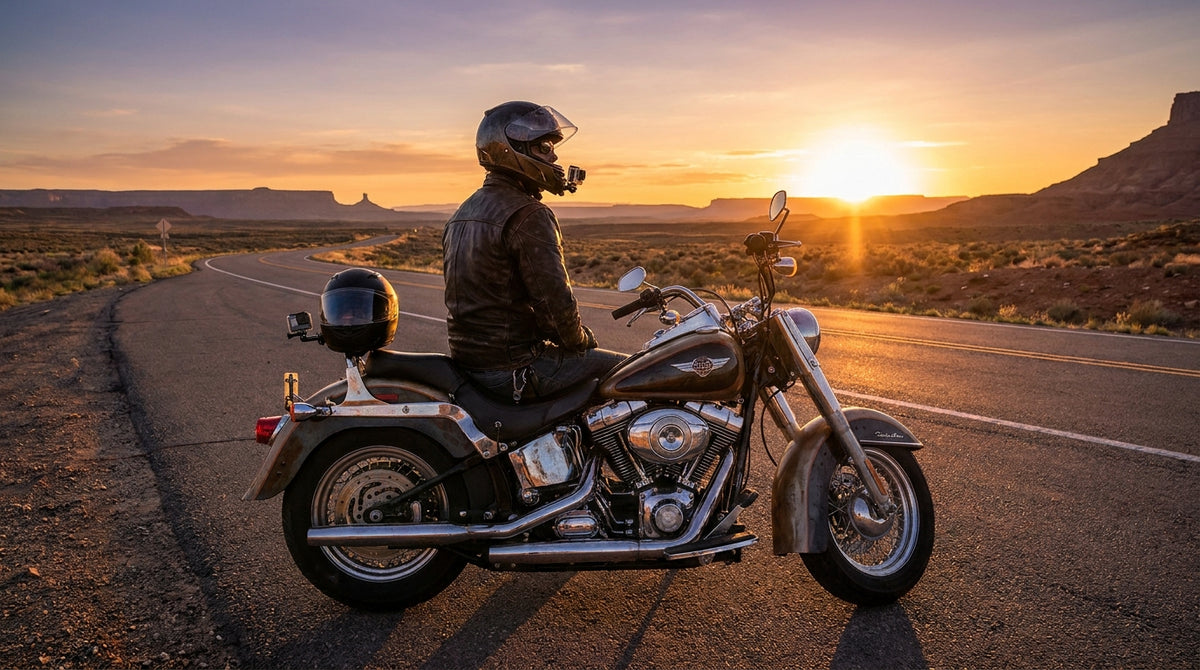
Most riders buy a camera first and think about the mount second. Then they get home, open the file, and watch 40 minutes of their own front fender bouncing in the bottom third of the frame. The camera was fine. The position was wrong.
Mount position decides everything about the footage: what is in frame, how much wind noise lands on the mic, and whether the thing is still attached when you pull into the driveway. A 150 g camera sitting at the top of your helmet behaves very differently at 70 mph than the same camera tucked under the chin bar.
This guide covers the four real positions for action camera mounts on a motorcycle, what each one actually films, which adhesives and clamps survive highway air, and which setup fits a full face versus a half helmet. By the end you will know which mount to buy and which one to skip.
The four positions for action camera mounts
Forget brand names for a second. Every motorcycle camera setup is one of four positions, and each one produces a completely different video.
1. Chin mount (under the chin bar)
The camera sits below the chin bar of a full face helmet, roughly at jaw height. This is the closest thing to the rider's own eye line. You get the road, a sliver of the bars and mirrors for context, and almost no helmet in frame. It also keeps the camera low, so the lever arm acting on the shell is short and the whole thing feels planted instead of wobbly.

2. Side mount (temple or ear area)
Stuck to the side of the shell near the ear vent. Side mounts are easy to reach, easy to swap batteries on, and they give a slightly turned-head perspective that looks good on twisty roads. The trade-off is asymmetry: wind hits the camera body side-on, and at sustained speed you can feel the pull on your neck after an hour.
3. Top mount (crown of the helmet)
The worst of the four for road riding, and the one most people try first. A camera on the crown sits in the dirtiest air on the whole helmet. It catches wind like a sail, it raises your profile, and the footage looks like a drone shot of your own handlebars. Top mounts earn their keep in one place only: filming over obstacles on trails where you need the extra height.
4. Chest or body harness
A harness puts the lens around sternum height. On a dirt bike or an aggressive sport posture this is excellent, because your chest is tilted forward and the lens points down the road with your hands and bars in frame. On a cruiser with an upright seating position it points at the sky and the top of your tank. Riding posture, not preference, decides whether a chest harness works for you.
Why chin mounts win for road riding
If you ride a street bike and want footage you will actually watch again, the chin mount is the default answer. Three structural reasons, not opinions.
- Stable air. The chin bar already splits the airflow, so the camera sits in a calmer pocket than the crown. Less buffeting means less of the high frequency shake that stabilizers fight and lose.
- Short lever arm. A camera at jaw height sits close to your neck's pivot. The same 150 g at the crown sits several inches higher, and that distance multiplies every force your head feels in a crosswind.
- Honest framing. Chin footage shows what you saw. Viewers read your line through a corner, which is the whole point of posting a ride.
One caveat worth saying out loud: anything bonded to a helmet shell is an attachment the helmet maker did not test. Keep mounts to the designed surfaces, never drill a shell, and treat a helmet that has taken an impact as finished regardless of what is stuck to it. If you are also putting graphics on your lid, the same surface rules apply, and our notes on helmet skins, wraps and decals cover what sticks and what peels.
Side mounts and the extension arm trick
Side mounting has one problem that a short arm solves. Flat against the shell, the lens is so close to the helmet that the helmet itself eats a corner of a wide frame, and your own shoulder blocks the view when you check a mirror. An extension arm pushes the camera out and slightly forward, which clears the shell and lets you swing the lens between forward view and a face-and-road angle.
The arm is also the cheapest way to turn one mount into several setups. The same arm works on a helmet, on a crash bar, or on a rear rack for a chase-cam shot of your own bike. At $19.95 it costs less than most single-purpose brackets.

Mount position comparison
Here is the short version for riders deciding between camera mounts for motorcycles.
| Position | What it films | Wind load | Best for | Weak spot |
|---|---|---|---|---|
| Chin bar | Rider eye line, road, mirror edge | Low | Street, touring, canyon runs | Needs a full face helmet |
| Side / temple | Turned-head view, bars in corners | Medium | Twisties, vlog-style talking | Asymmetric pull on the neck |
| Top / crown | High-angle view of your own bars | High | Trail riding over obstacles | Buffeting, noise, snag risk |
| Chest harness | Hands, bars, road ahead | Low | Dirt and forward riding posture | Points at sky when upright |
| Handlebar / frame | Fixed bike POV, no head movement | None on you | Dashcam-style and evidence clips | Engine vibration in the footage |
Adhesive, strap or clamp: what holds at highway speed
The mount style matters more than the mount brand. There are three attachment methods and they fail in different ways.
Adhesive pads. Quality stick-on mounts use 3M VHB tape, and the fitting instructions are not decoration. 3M's own guidance is that VHB reaches roughly half its bond strength about 20 minutes after application and full strength after about 72 hours. Stick a mount on in a cold garage and ride immediately and you are testing a bond at half strength in 70 mph air. Clean the shell with alcohol, press firmly for 30 seconds, and leave it overnight.
Straps and cradles. A strap that wraps the chin bar or runs under a vent lip needs no adhesive and leaves no residue, which matters if the helmet is a keeper or you swap lids. Straps do loosen with heat cycles, so a 10 second tug check before every ride is the habit that saves a camera.
Clamps. For bar, crash bar or mirror stem mounting, a metal clamp with a rubber shim is the only thing that holds up long term. Plastic clamps crack at the hinge after a season of vibration. Expect engine buzz in handlebar footage no matter what you clamp with.
Your helmet type decides your mount
This is the step most buyers skip, and it is why mounts get returned.
- Full face: every option is open. Chin mount first, side mount second.
- Modular: chin mounts work, but remember the whole chin bar lifts. Route nothing across the hinge and keep the camera clear of the pivot path.
- Open face or three quarter: no chin bar, so chin mounting is out. Side mount on the shell, or move the camera to the bike.
- Half helmet or beanie: too little shell area to carry a camera safely. Put the camera on the bars, the crash bar or a chest harness instead.
Space on the shell is also a real constraint once you add audio. If you already run a headset, plan the camera around the speaker pockets and the boom mic before you commit an adhesive pad. Our rundown of built-in versus add-on Bluetooth helmets is worth a read before you crowd one side of your lid with both.
If you are not buying a camera yet: the phone route
Plenty of riders already own a phone that shoots better 4K than a five year old action cam. A handlebar mount is the cheap way to find out whether you actually enjoy filming rides before spending real money on a camera and a mount system.
Two things matter. The clamp has to hold a modern phone at around 220 g without creeping, and there has to be vibration damping between the bar and the cradle, or your footage turns into jelly and your camera module takes the hit. A silicone universal holder at $19.95 is the no-commitment version.

If you ride a bike with a buzzy twin or a single, step up to a mount built with damping rather than one that just clamps hard. The dual-damper style at $38.99 exists because rigid mounts have a real reputation for shaking phone camera modules apart on long rides.

Power: the limit nobody plans for
Battery life is the thing that quietly ends most filming days. A small action camera recording 4K runs down in well under an hour and a half, and a phone running navigation plus video while in direct sun will drain faster than that. If you are documenting a whole day, you need power on the bike, not a pocket full of spare batteries you will forget to charge.
A handlebar mount with a wired USB port solves it for a phone and for any camera that can run while charging. It is the least exciting $48.45 in this guide and the one that changes what you can actually record. For the wider rundown of bar-mounted options, see our guide to the best motorcycle phone mounts.

5 mistakes that cost riders footage
- Mounting on a dirty or cold shell. Adhesive needs a clean, warm, dry surface. A pad applied over wax or bug residue in a 45 degree garage is a pad that will let go. Alcohol wipe, press, wait overnight.
- Skipping the tether. A thumbscrew backs itself out under vibration. A 20 cent safety lanyard from the camera frame to a strap or a vent means a loose mount costs you a mount and not a camera.
- Filming at the top of the helmet. Highest wind, worst noise, most snag risk, and the footage looks wrong. If you only own a top mount, move the camera to the bike.
- Full battery, empty card. Formatting in the camera before every ride takes 15 seconds and prevents the classic mid-ride stop with nothing recorded.
- Ignoring the mic. A bare lens at the chin picks up straight wind roar. A cheap foam or fur cover over the mic ports is the single biggest audio upgrade available, and it costs less than a tank of gas.
Legal and practical notes
Helmet-mounted camera rules are not uniform. Some countries and some racing or track-day organizations restrict what you may attach to a helmet, and a few jurisdictions have been specifically tested in court on helmet attachments. Check your own state or national rules and your track's tech inspection sheet before a trip, and check your insurance wording if you plan to use footage in a claim.
Practically, two habits cover most of it. Keep the camera profile low and smooth so there is nothing to catch, and use a breakaway or low-strength attachment rather than anything rigid and drilled. A camera that pops off on impact is doing exactly what you want it to do.
What to buy
For a full face helmet on the street, buy a chin mount and stop reading. It is the position that makes footage worth keeping, and it is the gentlest on your neck. Add an extension arm if you want the option of side angles, bike-mounted chase shots, and a lens that clears the shell. If you are still deciding whether filming is your thing, start with a damped handlebar phone mount and spend the camera money later.
Whatever you pick, buy the version with a metal clamp or a proper 3M pad over the unbranded marketplace bracket. A mount is the cheapest part of the setup and the only part holding the expensive part. Our motorcycle camera mount collection is where to start, and the handlebar mount range covers the phone-first route.
No comments yet. Be the first rider to weigh in.