A leather vest with the wrong patch setup looks thrown together fast. A leather vest with the right patch layout looks earned, personal, and road-ready. That is why motorcycle patches for leather vest builds matter more than a lot of riders think. Your vest is not just another layer - it is part identity, part tradition, and part first impression.
Some riders want a clean three-piece setup. Some want a stripped-down look with one strong back patch and a few smaller hits up front. Others are building a vest that leans hard into skulls, flags, rally pins, memorial pieces, or military service. There is no single right formula, but there is a right approach if you want your vest to look sharp and last.
Choosing motorcycle patches for leather vest builds
The first call is not color or artwork. It is purpose. Are you building a club-style vest, a casual biker vest, a rally vest, or a personal statement piece? That answer shapes everything else, from patch size to placement to how much open leather you leave visible.
If your vest is for everyday riding, durability needs to lead. Embroidered patches with tight stitching and clean edge finishing usually hold up better than cheap printed pieces that crack, peel, or fray after a season. Leather is already a tough material, so weak patches stand out in the worst way. Riders notice bad quality fast.
Size matters more than most people expect. A patch that looks great on a table can look tiny once it hits the back of a full-cut vest. On the front, oversized patches can crowd pockets, zippers, snaps, and concealed-carry compartments. The patch should fit the panel, not fight it.
Color is another trade-off. High-contrast patches pop harder on black leather, especially white, red, orange, and yellow thread. But a vest loaded with loud colors can start looking busy if every patch is screaming for attention. Sometimes a tighter color range gives the whole build more muscle.
What makes a vest look legit instead of cluttered
A strong vest usually has a visual center. That can be a large back patch, a rocker setup, or one dominant chest patch that sets the tone. Once that anchor is in place, the smaller patches should support it, not compete with it.
Spacing does a lot of heavy lifting. Too much empty space and the vest feels unfinished. Too little and it starts to look like a bargain-bin bulletin board. Good spacing gives each patch room to read while keeping the overall layout tight. On leather, that clean structure matters because the material already has visual weight.
Symmetry can work, but it is not required. A balanced vest often looks better than a perfectly mirrored one. For example, a name patch on one side and a service or flag patch on the other can feel stronger than forcing both sides into an exact match. It depends on the style you are after. Some riders want military-clean. Others want road-worn and personal.
Patch shape changes the whole look too. Round patches tend to soften a layout. Rectangles and rockers feel more traditional and more aggressive. Odd shapes can work if used sparingly, but too many novelty outlines can cheapen the build.
Best placement for motorcycle patches for leather vest layouts
The back panel is the main event. If you are using a large centerpiece patch, make sure it sits where it can be fully seen when the vest is worn, not just when it is laid flat. Leather bends around the shoulders and lower back, so placement has to account for body shape, not just panel dimensions.
Upper back rockers and bottom rockers need clean alignment. If they sit crooked, everybody sees it. If they crowd the center patch, the whole setup feels off. This is where measuring before attaching matters. Guesswork is how good patches end up looking bad.
Front placement needs more restraint. Chest patches should not block pocket access or sit too close to seams. A small stack of event patches can look good on one side, while the other side stays cleaner with a name patch or small emblem. If your vest has concealed-carry pockets or interior storage, avoid anything that interferes with how the vest functions. Looks matter, but so does use.
Side panels are often overlooked. They can be a good spot for slim patches, memorial tabs, or state identifiers if the front and back are already spoken for. But side placement only works when the vest cut gives enough flat area. On some vests, the side curve distorts the patch and makes it harder to read.
Sew-on or iron-on
For leather, sew-on usually wins. It is more secure, more traditional, and better for long-term wear. Iron-on backing may seem easier, but leather and heat do not always play nice together. Too much heat can mark the material, weaken adhesives, or create a bond that fails once the vest sees sun, sweat, and miles.
That does not mean iron-on patches are useless. Some riders use the adhesive only to hold the patch in place before stitching. That can help with alignment, especially on larger back pieces. But trusting adhesive alone on a riding vest is a gamble.
Professional stitching is often worth it for big or important patches. A crooked stitch line on a premium leather vest is not a small mistake. If the patch means something to you, or the vest cost real money, clean install work is a smart move.
Matching patch style to vest style
A classic black leather vest with side laces can handle bold, old-school embroidered patches with heavy borders and traditional biker graphics. A cleaner concealed-carry vest often looks better with a more controlled layout and fewer novelty pieces. Denim over leather has its own lane too, but on straight leather, every patch carries more visual weight.
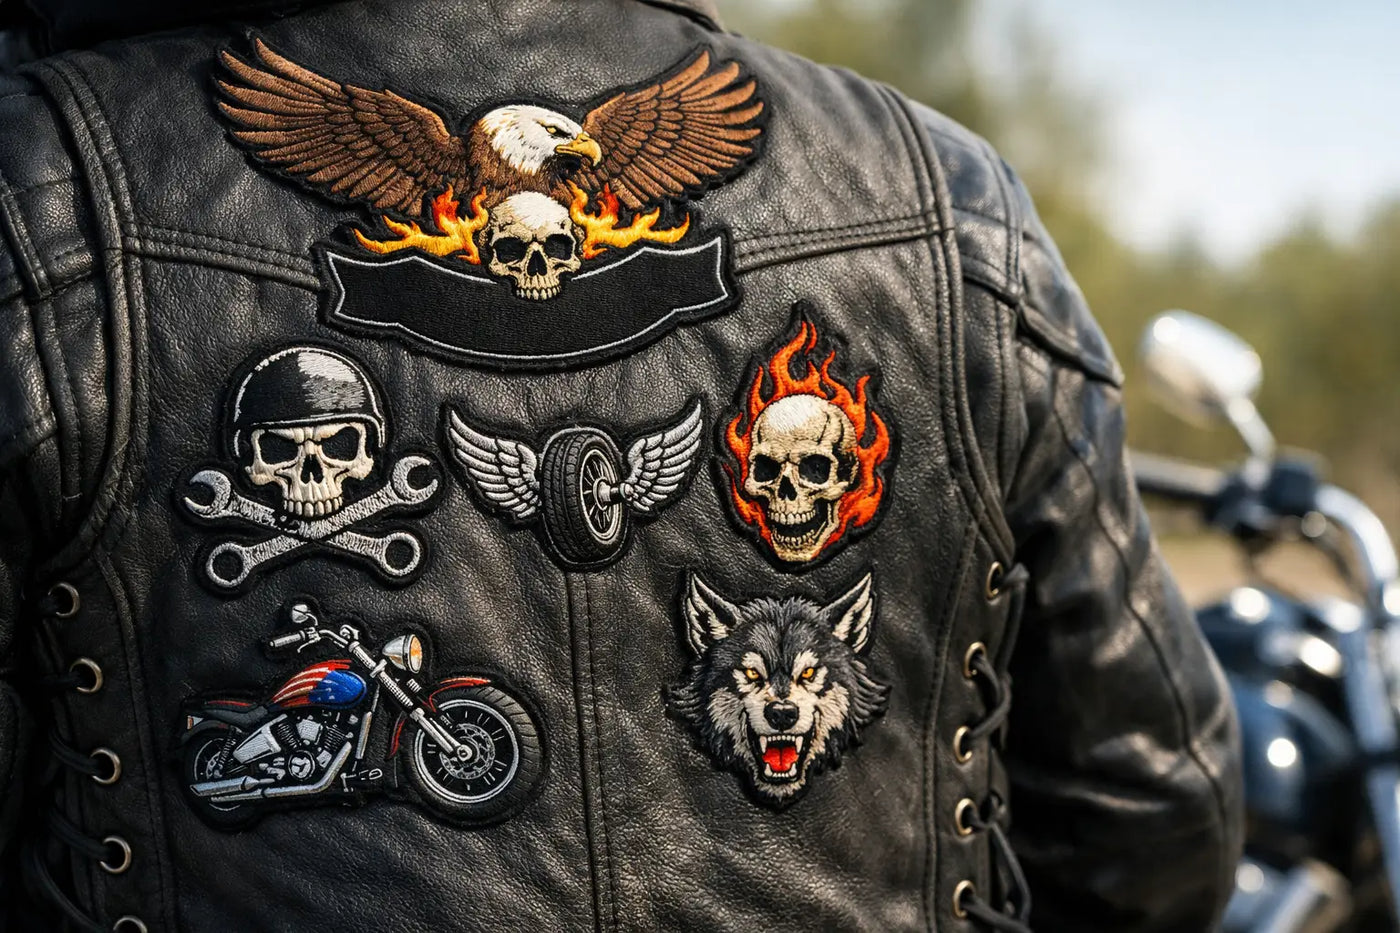
Skull graphics, eagles, American flags, flames, road names, and memorial patches all hit differently depending on the vest cut. If the vest already has a lot going on - contrast stitching, braided trim, extra hardware - simpler patches can keep it from getting overloaded. If the vest is plain and heavy-duty, that gives you more room to bring in louder artwork.
This is where personal taste matters, but discipline matters too. Not every patch you like belongs on the same vest. Some riders are better off building one rally vest and one everyday vest instead of forcing every part of their identity onto a single piece of leather.
Quality matters more than a low price tag
Cheap patches save money for about five minutes. Then the stitching loosens, the border curls, the colors fade, or the backing fails. On a leather vest, low-grade patches stand out because the vest itself usually looks tougher than the patch attached to it.
Look for dense embroidery, clean borders, consistent thread color, and a backing that feels substantial. Thin, limp patches can wrinkle once sewn down. Thick, well-made patches hold their shape better and read cleaner from a distance.
The same goes for the vest itself. Soft fashion leather and road-ready leather do not age the same. If your vest gets real ride time, your patches need to be able to take sun, wind, and movement without breaking down. That is why riders who care about the final result shop with stores that understand biker gear instead of treating patches like random costume accessories. American Legend Rider leans into that difference with gear and patch styles built for actual rider taste, not generic mall-rack styling.
Build a vest that still looks right a year from now
Trends come and go fast. One season everybody wants oversized novelty patches. Next season riders are stripping their vests back down to cleaner layouts. If you want a vest that stays sharp, start with pieces that mean something and leave room to grow.
That does not mean your vest has to stay minimal forever. It means you should avoid rushing the layout just to fill space. A good vest can evolve over time. Event patches, memorial pieces, chapter support, state pride, military service, and ride milestones all add up differently when they are placed with some thought.
The strongest leather vests usually feel intentional. Not sterile. Not overdesigned. Just solid. When the patch quality is there, the placement makes sense, and the style matches the rider, the whole thing works.
A leather vest should look like it belongs on the road, not like it got assembled in a hurry. Pick patches with backbone, place them with purpose, and give your vest a layout that earns a second look for the right reasons.


No comments yet. Be the first rider to weigh in.